Leave Your Message

What Are the Top 10 PC Components?

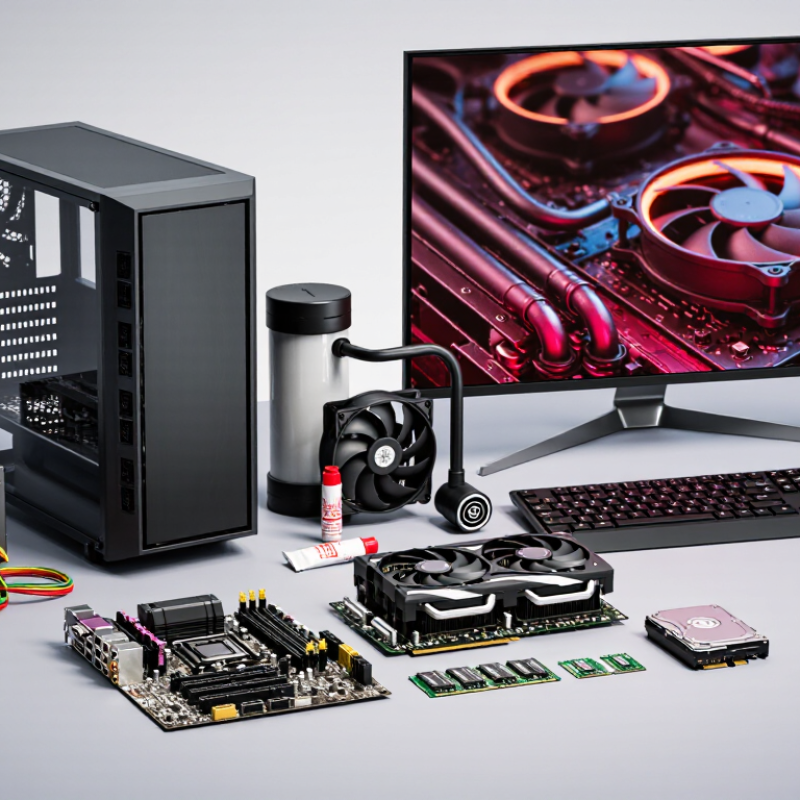
A PC is more than a fast processor or a colorful graphics card. Its parts must work together, fit the case, and receive stable power. This guide examines ten essentials: the CPU, motherboard, memory, graphics card, storage drive, power supply, case, cooling system, monitor, and keyboard and mouse. The last two are peripherals, not internal parts, but they shape everyday use.

Gordon Moore, Intel co-founder, wrote in 1965, “The complexity for minimum component costs has increased at a rate of roughly a factor of two per year.” His observation concerned integrated circuits, not today’s complete PC builds. Still, it points to a useful idea: component capabilities and trade-offs change over time. A practical buying decision should therefore consider current needs, compatibility, reliability, and budget—not just a model’s headline speed.

Small details matter. A graphics card may be too long for a compact case. A power supply may lack the connectors a system needs. Even fast storage can feel wasteful if a user mainly browses and writes documents. There is no perfect ranking for everyone. That is the part worth questioning. The following overview explains what each component does, where quality matters most, and which compromises deserve a closer look before you build or upgrade.
What Are the Top 10 PC Components?

Core Platform: Motherboards and CPUs in a PCIe 5.0, 32-GT/s Era

A motherboard and CPU set the rules for a modern PC’s core platform. With PCIe 5.0, each lane signals at 32 gigatransfers per second. That figure is not the same as usable data throughput. Encoding overhead reduces the theoretical rate, and real performance also depends on the device and workload.

The CPU determines how many PCIe lanes are available and how they are divided. A graphics slot may use sixteen lanes, while fast storage connects through separate lanes or the chipset. Check the motherboard manual before choosing parts. Slot shape alone does not guarantee full electrical bandwidth. A drive installed in one M.2 socket may also disable a shared port. Small details matter.

PCIe 5.0 demands careful board design because faster signals are more sensitive to trace quality and interference. Strong routing, suitable connectors, and firmware support all help maintain a stable link. Cooling deserves attention, too. Some high-speed storage devices run hot under sustained transfers, so a heatsink and airflow can prevent performance drops. Not always obvious. For a practical build, compare the CPU’s lane allocation with the board’s slot map, then confirm memory and BIOS compatibility. I would not pay for the newest interface automatically; many everyday tasks barely notice it. That trade-off is easy to overlook.

Memory and Storage: DDR5-6400, NVMe SSDs, and Hard Drives

Memory and storage shape how quickly a PC opens projects, loads games, and handles large files. JEDEC’s DDR5 standard covers data rates up to 6,400 MT/s, making DDR5-6400 a practical target for a modern system. But a higher rate alone does not guarantee a noticeable improvement. Capacity, memory timings, and the processor’s supported configuration also matter. Capacity is not speed. For everyday work, 32 GB gives demanding applications more breathing room than 16 GB, though actual needs vary.

For storage, an NVMe solid-state drive can make startup and file searches feel immediate, especially beside a mechanical hard drive. The NVM Express specification defines the protocol; PCIe 4.0 x4 offers a theoretical link rate near 7.9 GB/s before overhead. Real transfers are lower, and small-file performance may matter more than headline sequential speed. A large hard drive remains useful for backups, archives, and media libraries, where cost per terabyte can be attractive. Still, one drive is not a backup plan. A second copy on a separate device is safer. I would compare measured application load times, capacity, and endurance, not just box labels; benchmark results can flatter a setup that feels ordinary in daily use.

Graphics: GPU Roles, VRAM, and PCIe 5.0 Connectivity

A graphics processing unit (GPU) draws game scenes, accelerates visual effects, and handles some creative workloads. Its performance depends on more than its advertised speed. Cooling, power delivery, and the computer’s processor can all affect real results. A useful test is to match the GPU to your monitor: high resolutions and demanding effects usually need more graphics capacity. Bigger is not always better.

Video memory, or VRAM, stores textures, frame data, and other graphics assets near the GPU. Insufficient capacity can cause stuttering or force lower texture settings, especially at high resolutions. More VRAM alone does not guarantee faster performance. PCIe 5.0 offers substantial bandwidth, but a compatible graphics card and motherboard must both support it. In many everyday gaming setups, the difference from an earlier PCIe generation may be small. The slot number can distract from more practical limits.

Tips: Check your display resolution, typical workloads, and power supply before choosing a GPU. Keep some VRAM headroom for demanding games or large creative projects. Compare measured performance in applications you actually use, not just specifications. One detail is easy to miss: a technically compatible card may still be a poor fit for your case or cooling. Recheck clearances.

Power Delivery: ATX 3.1 and the 600-W 12V-2x6 Connector

ATX 3.1 updates power-delivery guidance for newer, high-demand graphics cards. Its 12V-2x6 connector can deliver up to 600 watts when paired with a suitable power supply and cable. That rating is a ceiling, not a promise that every computer will draw that much. The rest of the system still needs adequate power capacity and cooling.

The connector’s revised contact arrangement is designed to reduce the chance of power flowing before the plug is properly seated. Even so, careful installation matters. Push the plug in fully, then check that no gap remains between its housing and the socket. Avoid sharply bending the cable close to the connector; a tight bend can pull the plug out of position. Small details count.

A useful build check is to route the cable with the side panel open, then inspect it again after closing the case. If the panel presses against the cable, adjust the route rather than forcing it flat. Use a cable approved for the power supply, and follow its installation instructions. I would not treat a newer standard as a substitute for a hands-on check; connectors can still be seated poorly, and that part is easy to miss.

PC Power Delivery: Connector Ratings

Maximum rated power for common PCIe graphics-card power connectors

A PCIe 6-pin connector is rated for up to 75 W, an 8-pin for up to 150 W, and the 12V-2x6 connector for up to 600 W. Actual system power depends on the graphics card, power supply, and correctly connected cables.

Cooling and Enclosure: CPU Coolers, Case Fans, and Airflow

A CPU cooler must move heat away from the processor and into the case airflow. A tower-style air cooler works best when its fan pushes air toward a rear exhaust fan. Liquid cooling can relocate heat to a radiator, but the radiator still needs a clear intake or exhaust path. Air needs a path. A large cooler may also block memory slots, so check component clearances before buying.

Case fans work as a system, not as isolated parts. Front or lower fans commonly draw cool air in, while rear or upper fans exhaust warm air. Keep filters clean; a layer of dust can restrict intake and raise temperatures. Fan direction is easy to mix up. Check the small arrows on each fan frame before installation.

More fans do not automatically mean better cooling. Uneven airflow can create noisy turbulence, and a tidy layout can still leave a warm pocket behind the graphics card. Check CPU and graphics temperatures during a sustained workload, not just at idle. If temperatures climb, inspect fan direction, blocked vents, and cable placement before adding hardware. A small adjustment may help more than another fan.

What Are the Top 10 PC Components? — Cooling and Enclosure: CPU Coolers, Case Fans, and Airflow
Component Common Types or Sizes Primary Purpose Practical Selection and Setup Notes
CPU air cooler Tower cooler; downdraft cooler; heat pipes and fin stack Transfers heat from the processor to a fin stack, where a fan moves air across the fins. Check the cooler’s supported CPU socket, case height clearance, and memory clearance. Tower coolers are commonly oriented to move air toward the rear exhaust fan.
CPU liquid cooler Closed-loop units with 120 mm, 240 mm, 280 mm, or 360 mm radiators Moves heat from a CPU cold plate to a radiator, which dissipates it through airflow. Confirm radiator and fan fit, including thickness and tube routing. A larger radiator can provide more surface area, but compatibility depends on the case and component layout.
Case fans Common frame sizes: 120 mm and 140 mm Bring cool air into the enclosure or exhaust warmed air from it. Check the case’s mounting points and fan-header capacity. Fan speed, blade design, and restrictions in front panels or filters affect actual airflow and noise.
Radiator fans Fans mounted against a radiator; often 120 mm or 140 mm Push or pull air through the radiator’s closely spaced fins. Fans designed for stronger static pressure can be useful against resistance from radiator fins. Ensure the fan and radiator assembly fits the chosen case position.
Ventilated case front panel Mesh, perforated panels, or other open-intake designs Provides an intake path for fresh air to reach internal components. More open panels can reduce intake restriction, while panel layout and included filters also affect airflow. Keep front intakes unobstructed.
Dust filters Removable mesh or fine-screen panels, commonly at intake openings Reduce dust entering through case air intakes. Filters add resistance and need periodic cleaning. Fit them over intake openings and follow the case maker’s cleaning instructions.
Fan speed control Motherboard fan headers, temperature-based curves, or a fan controller Adjusts fan speed in response to temperature or user settings. Use compatible PWM or voltage control as required by the fan. A gradual temperature-based curve can balance cooling with noise during lighter workloads.
Fan hub or splitter Multi-port fan hub; motherboard-header splitter Connects multiple fans when available headers are limited. Check the header’s current limit. Some hubs draw power separately from the power supply; a splitter generally shares the header’s control signal and power limit.
Thermal interface material Thermal paste between the CPU heat spreader and cooler base Fills microscopic surface gaps to improve heat transfer across the contact area. Apply according to the cooler or paste instructions and avoid using excessive material. Reapply when removing and reinstalling a cooler if the existing layer is disturbed.
Airflow layout and cable routing Front or bottom intake; rear or top exhaust Creates a clear path for cooler air to enter and warmed air to leave the enclosure. A common starting layout is front intake with rear exhaust. Route cables away from fan blades and major airflow paths, then check component temperatures under load.