A bright ring of addressable LEDs can make a gaming PC look striking, but lighting cannot cool a processor. A good ARGB Liquid Cooler must also fit the case, manage heat, and stay tolerable during long sessions. Pump noise matters. So does radiator clearance. Even cable routing can affect a clean installation.
Gamers Nexus founder Steve Burke is known for hands-on cooler testing. A fair paraphrase of the testing principle his reviews demonstrate is: “Compare temperatures and noise together; lighting alone tells you little.” That distinction matters when choosing among the top ARGB liquid coolers for gaming PCs. A model may look vivid through tempered glass yet run louder than expected. Another may cool effectively but leave little room around the motherboard. Small details count.
This guide examines performance, acoustics, installation, and lighting control, rather than treating RGB effects as proof of quality. It also considers radiator size, fan layout, software support, and compatibility with common PC builds. No single cooler suits every system. Case dimensions, processor demands, and personal noise tolerance all change the answer. That part is easy to overlook.
The comparisons should help readers narrow their options, not promise identical results. Ambient temperature, case airflow, and workload can shift test outcomes. A careful choice starts with fit and cooling needs, then weighs appearance. A glowing pump is nice. A balanced system is better.
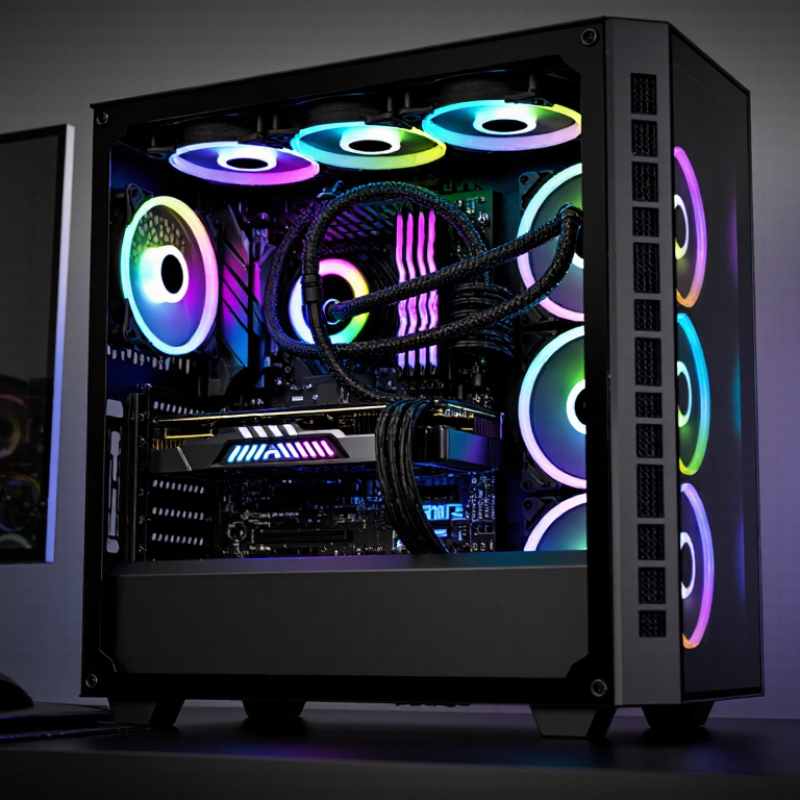
In a gaming PC, an ARGB liquid cooler carries heat from the processor to a radiator. A metal cold plate sits against the CPU, with thermal paste filling tiny surface gaps. The pump moves liquid through the sealed loop, picking up heat at the plate and releasing it through the radiator. Fans push warm air through the radiator fins and out of the case. That is cooling. ARGB lighting works separately. Addressable LEDs can display different colors across the pump cover and fans, depending on the connected controller and software. Light is not extra cooling.
Good results depend on more than the cooler itself. Check that the radiator fits the case and that its fans have a clear path for airflow. During installation, snug mounting pressure and an even layer of thermal paste matter; rushing either step can cause problems. Fan direction is easy to misread, too. More color does not mean lower temperatures, and bright lighting can distract from a poorly planned airflow layout. It is tempting to assume the software will coordinate every LED, but some setups need separate connections or settings. That assumption deserves a second look. A loose lighting cable may leave the cooler working normally while part of the display stays dark. When temperatures seem high, check mounting, fan speed, and airflow before blaming the lighting.

ARGB liquid coolers add programmable lighting while moving heat away from a gaming processor. Compare radiator size, socket compatibility, and case clearance before judging appearance. A 240 mm radiator may fit a compact case, but measure the top and front mounting areas carefully. Lighting catches the eye. Pump noise and fan tone matter during long gaming sessions, too.
Check whether the cooler’s fans and pump can connect to your motherboard’s ARGB headers. Some setups need a separate controller, which adds cables and can make installation less tidy. Look for clear warranty terms and published noise or cooling tests, then compare results under similar conditions. A bigger radiator can help, but it does not guarantee quieter operation; fan speed and case airflow also affect sound and temperatures. I would not rely on one review alone.
Tips: Before installation, check tubing reach and leave room around the RAM. Set a modest fan curve, then monitor temperatures during a real gaming session. If the lighting works but the pump hum bothers you, reconsider the balance.
ARGB liquid coolers differ mainly in radiator size, fan layout, and lighting placement. A 120 mm model can suit a compact case, though one fan may become audible during long gaming sessions. A 240 mm radiator fits many mid-tower builds and offers a practical balance. Larger 280 mm and 360 mm units provide more cooling surface, but only when the case has enough space. Bigger is not automatically better.
Lighting may come from the fans, pump cap, or both. Check the connector type before planning cable routes: standard ARGB usually uses a 5V, three-pin header, while 12V, four-pin RGB is different. Never force a connector into the wrong header. Cable routing matters. Some coolers also require a controller, which can add clutter behind the motherboard tray.
Measure radiator thickness and fan clearance around memory and heatsinks, not just the advertised radiator length. Front mounting can help CPU temperatures but may feed warmer air into the case; top exhaust often removes heat effectively. Results still depend on the rest of the airflow setup. One imperfect part of planning is that case charts may not show every bracket or cable obstruction. Check independent noise and temperature tests, then choose a layout that avoids sharply bent tubes and leaves room to clean dust from the fins. Fit comes first.
| Configuration | Typical Radiator Format | Common Fan Setup | Best Suited For | Key Considerations |
|---|---|---|---|---|
| 120 mm AIO | One 120 mm fan position; radiator length is usually about 150–160 mm, depending on the model. | 1 × 120 mm fan | Compact cases with limited radiator mounting space. | Usually offers less cooling capacity than larger AIOs; compare its value with a capable air cooler. |
| 240 mm AIO | Two 120 mm fan positions; radiator length is commonly around 270–280 mm. | 2 × 120 mm fans | Mainstream gaming builds and many mid-tower cases. | A popular balance of cooling capacity, case compatibility, and cost. Check radiator thickness and memory or motherboard clearance. |
| 280 mm AIO | Two 140 mm fan positions; radiator length is commonly around 310–325 mm. | 2 × 140 mm fans | Cases with 140 mm radiator support and users seeking a larger fan format. | 140 mm fans can move air at lower rotational speeds than smaller fans, but case support should be checked carefully. |
| 360 mm AIO | Three 120 mm fan positions; radiator length is commonly around 395–405 mm. | 3 × 120 mm fans | High-performance gaming systems and larger mid-tower or full-tower cases. | Requires substantial mounting space. Confirm front or top clearance and whether the radiator conflicts with other components. |
| 420 mm AIO | Three 140 mm fan positions; radiator length is commonly around 450–465 mm. | 3 × 140 mm fans | Large cases and systems designed for a generously sized radiator. | Offers a large heat-exchange area, but case compatibility is limited; verify mounting points and total radiator-plus-fan thickness. |
| ARGB AIO with illuminated pump block | Available in several radiator sizes, commonly 240, 280, or 360 mm. | Radiator fans with addressable lighting; pump-block lighting may also be included. | Builds where coordinated lighting is desired on both the radiator and CPU block. | Lighting features vary. Check the number and type of lighting connectors and the motherboard or controller requirements. |
| ARGB AIO with fan-only lighting | Available in multiple radiator sizes; the pump block may be unlit. | Addressable RGB radiator fans; lighting on the pump block is not guaranteed. | Systems that prioritize illuminated fans while keeping the CPU block visually simple. | Confirm which parts are illuminated in the product specifications; ARGB fan lighting does not imply pump lighting. |
Compatibility note: Radiator dimensions are approximate and vary by design. Check the case manufacturer’s radiator support, component clearances, CPU socket support, and required connectors before purchase. Standard motherboard ARGB headers are typically 5 V, 3-pin; do not connect a 5 V ARGB plug to a 12 V, 4-pin RGB header.
Choosing an ARGB liquid cooler starts with the processor’s real heat output, not the lighting or radiator size. An official 2023 desktop-processor specification lists 125 W base power, 253 W maximum turbo power, and a 100°C junction limit. That gap matters: a cooler sized only around base power may struggle during long gaming sessions or rendering. Check independent thermal tests that use sustained workloads, and compare temperatures and noise—not just peak cooling claims. A few degrees are not the whole story.
Then measure the case. A 360 mm radiator may look reassuring, but it can conflict with top-mounted fans, tall memory modules, or front-panel clearance. A 240 mm unit may fit cleanly and leave better airflow to the graphics card. Check radiator thickness, tube reach, pump placement, and the motherboard’s ARGB header type before buying. Small details matter. I would leave some clearance rather than trust a perfect-looking diagram; real builds can be awkward. Also consider fan noise at your usual gaming load, since a quiet idle test says little about a warm room and hours of play. ARGB is a bonus, not a cooling metric. A tidy cable route and accessible lighting controls can make daily use nicer, though they will not fix poor airflow.
Radiator size is a practical starting point when choosing an ARGB liquid cooler. Common 240 mm and 280 mm radiators use two fans, while 360 mm and 420 mm radiators typically use three. Check your case’s radiator clearance and fan support before buying.
Before buying an ARGB liquid cooler, check the case manual for radiator length, thickness, and mounting positions. A 240 mm radiator may still collide with tall memory modules or a top-mounted power connector. Confirm that the cooler includes mounting hardware for your processor socket, and verify clearance around the motherboard. Measure twice. ARGB wiring matters, too: a 5-volt, three-pin connector is not interchangeable with a 12-volt, four-pin header. Check the motherboard manual instead of guessing; the wrong connection can damage lighting components.
During installation, secure the radiator without bending its fins, and route tubes without sharp kinks. When possible, place the radiator above the pump so trapped air is less likely to collect inside it. Tighten the pump block evenly in a diagonal pattern, following its instructions. Connect the pump and fans to the correct headers, then check that both appear in firmware or monitoring software. Cable routing is easy to underestimate. Leave enough slack for the side panel, but keep wires clear of fan blades.
Every few months, remove dust from the radiator fins with gentle airflow, holding the fans still while cleaning. Watch for rising temperatures, unusual grinding, or moisture near fittings; shut down and inspect if anything seems wrong. Most sealed coolers are not designed for refilling, so do not open the loop. Fan curves may need adjustment after installation, and a careful setup can still need a second pass.